TABLE OF CONTENTS
- Step 1: Customizing the Header
- Step 2: Adding Links
- Step 3: Adding Social Media Icons
- Step 4: Adding Components
- Step 5: Customizing Text and Images
- Step 6: Adding a Video
- Step 7: Adding a Form
- Step 8: Customizing the Footer
In today's digital age, having a website is essential for any business or individual looking to establish an online presence. Not everyone has the technical know-how or resources to build one from scratch, though — that's where the Renderforest Website Builder tool comes in, making it easy to create a professional-looking website regardless of your technical expertise. This article walks you through building a website using the tool.
Step 1: Customizing the Header
The header is the first thing your visitors see when they land on your website. It typically includes your company name, logo, a short description, and navigation links.
You can change the background image mode to dark, light, or extra light, and you can replace the background image or video, adjust its transparency, or delete it entirely.


To add your company logo, you can upload a file from your device, embed an image URL, use a stock image, create a logo with the Logo Maker tool, or select a previously created logo from "My Files."


Step 2: Adding Links
To help visitors navigate your website, add links in the header — to external websites, to components on the main page, or to pages you'll create later. Click "Add Link" to get started.

Step 3: Adding Social Media Icons
Social media is a great way to keep in touch with your customers and promote your business. Social media icons are component-based — if your chosen header or footer component includes them, you can customize each icon by linking it to a social media URL, editing the icon itself, or deleting it from the list.


Step 4: Adding Components
The Website Builder tool offers a wide range of components — text holders, team members, video holders, and more. Click "Add Component" and select the one that fits your needs.


Step 5: Customizing Text and Images
Once you've added a component, customize it to suit your project. Selecting a text holder brings up a formatting toolbar with Bold, Italic, <u>Underline</u>, text alignment options, a link tool, and "Text Wizard AI" — an AI-assisted way to help write or refine your text.
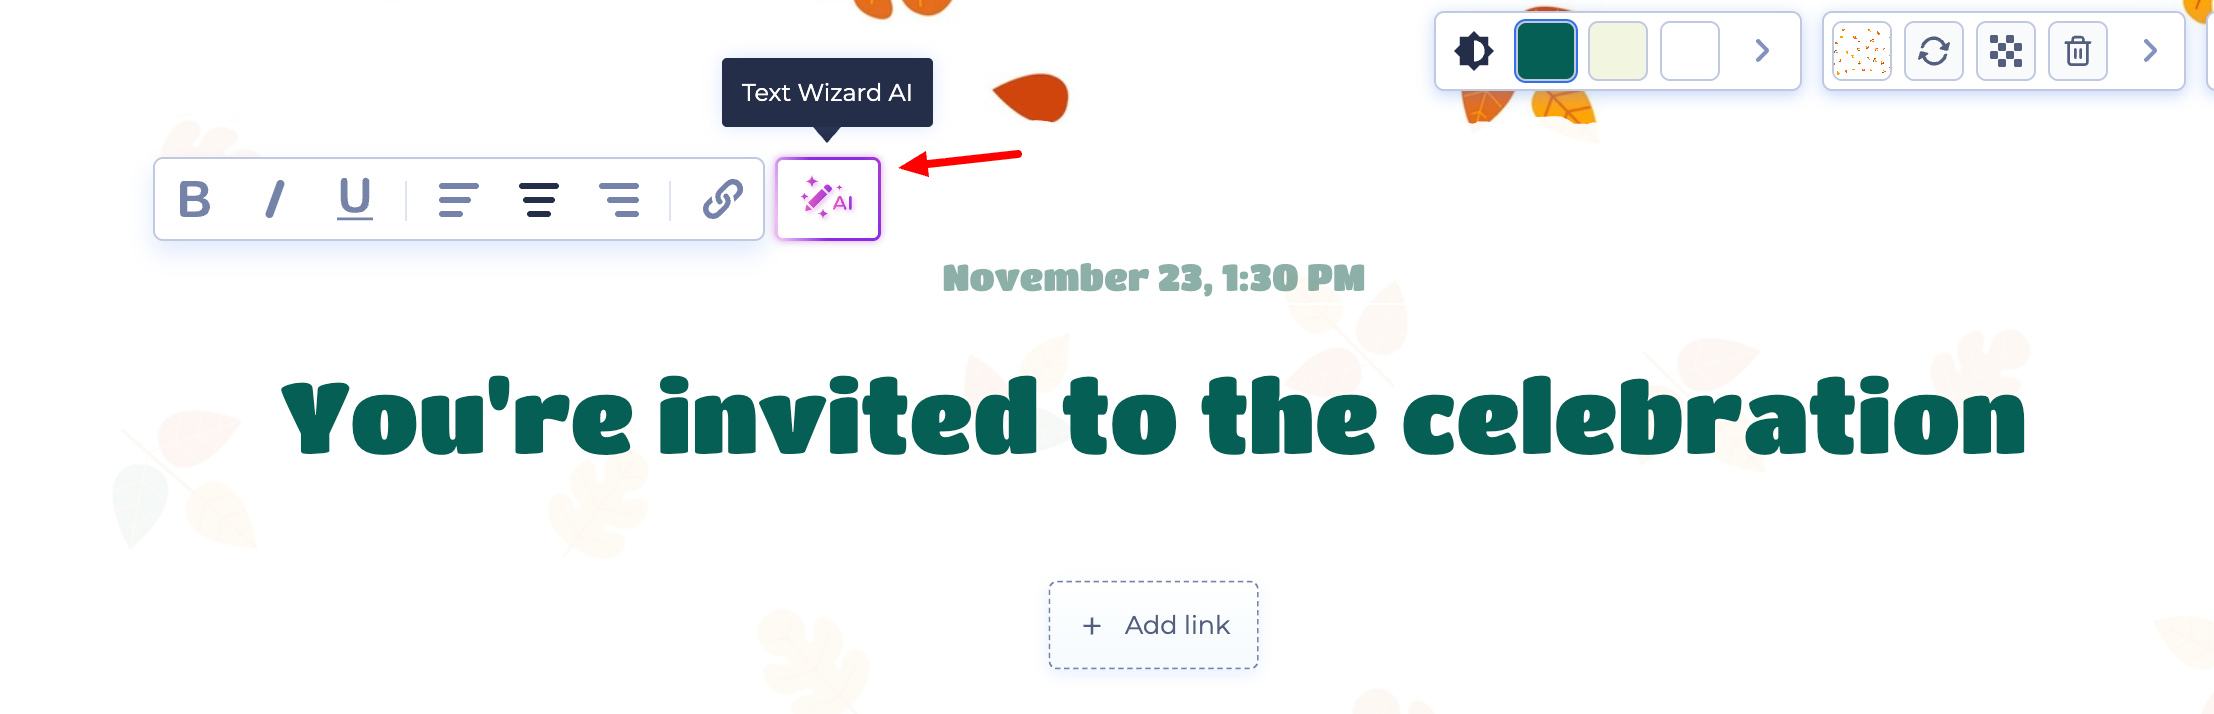
To showcase your product or portfolio, add a new component with image holders, then update the images by uploading from your device, selecting from "My Files," using a stock image, or embedding an image URL.

Step 6: Adding a Video
Add a video to your website by replacing a video holder with a link from a video-publishing platform, such as YouTube or Vimeo.


Step 7: Adding a Form
To collect contact information from your visitors, add a form to your website. You can update the email address, add a phone number, and customize the form to fit your needs.


Step 8: Customizing the Footer
The last step is customizing your footer. Use the replace option to see what's available — some footers include a map integration or a subscription form.


With the Website Builder tool's easy-to-use interface and wide range of features, you can create a professional-looking website without any prior technical knowledge.
Was this article helpful?
That’s Great!
Thank you for your feedback
Sorry! We couldn't be helpful
Thank you for your feedback
Feedback sent
We appreciate your effort and will try to fix the article