Adding and Editing Text
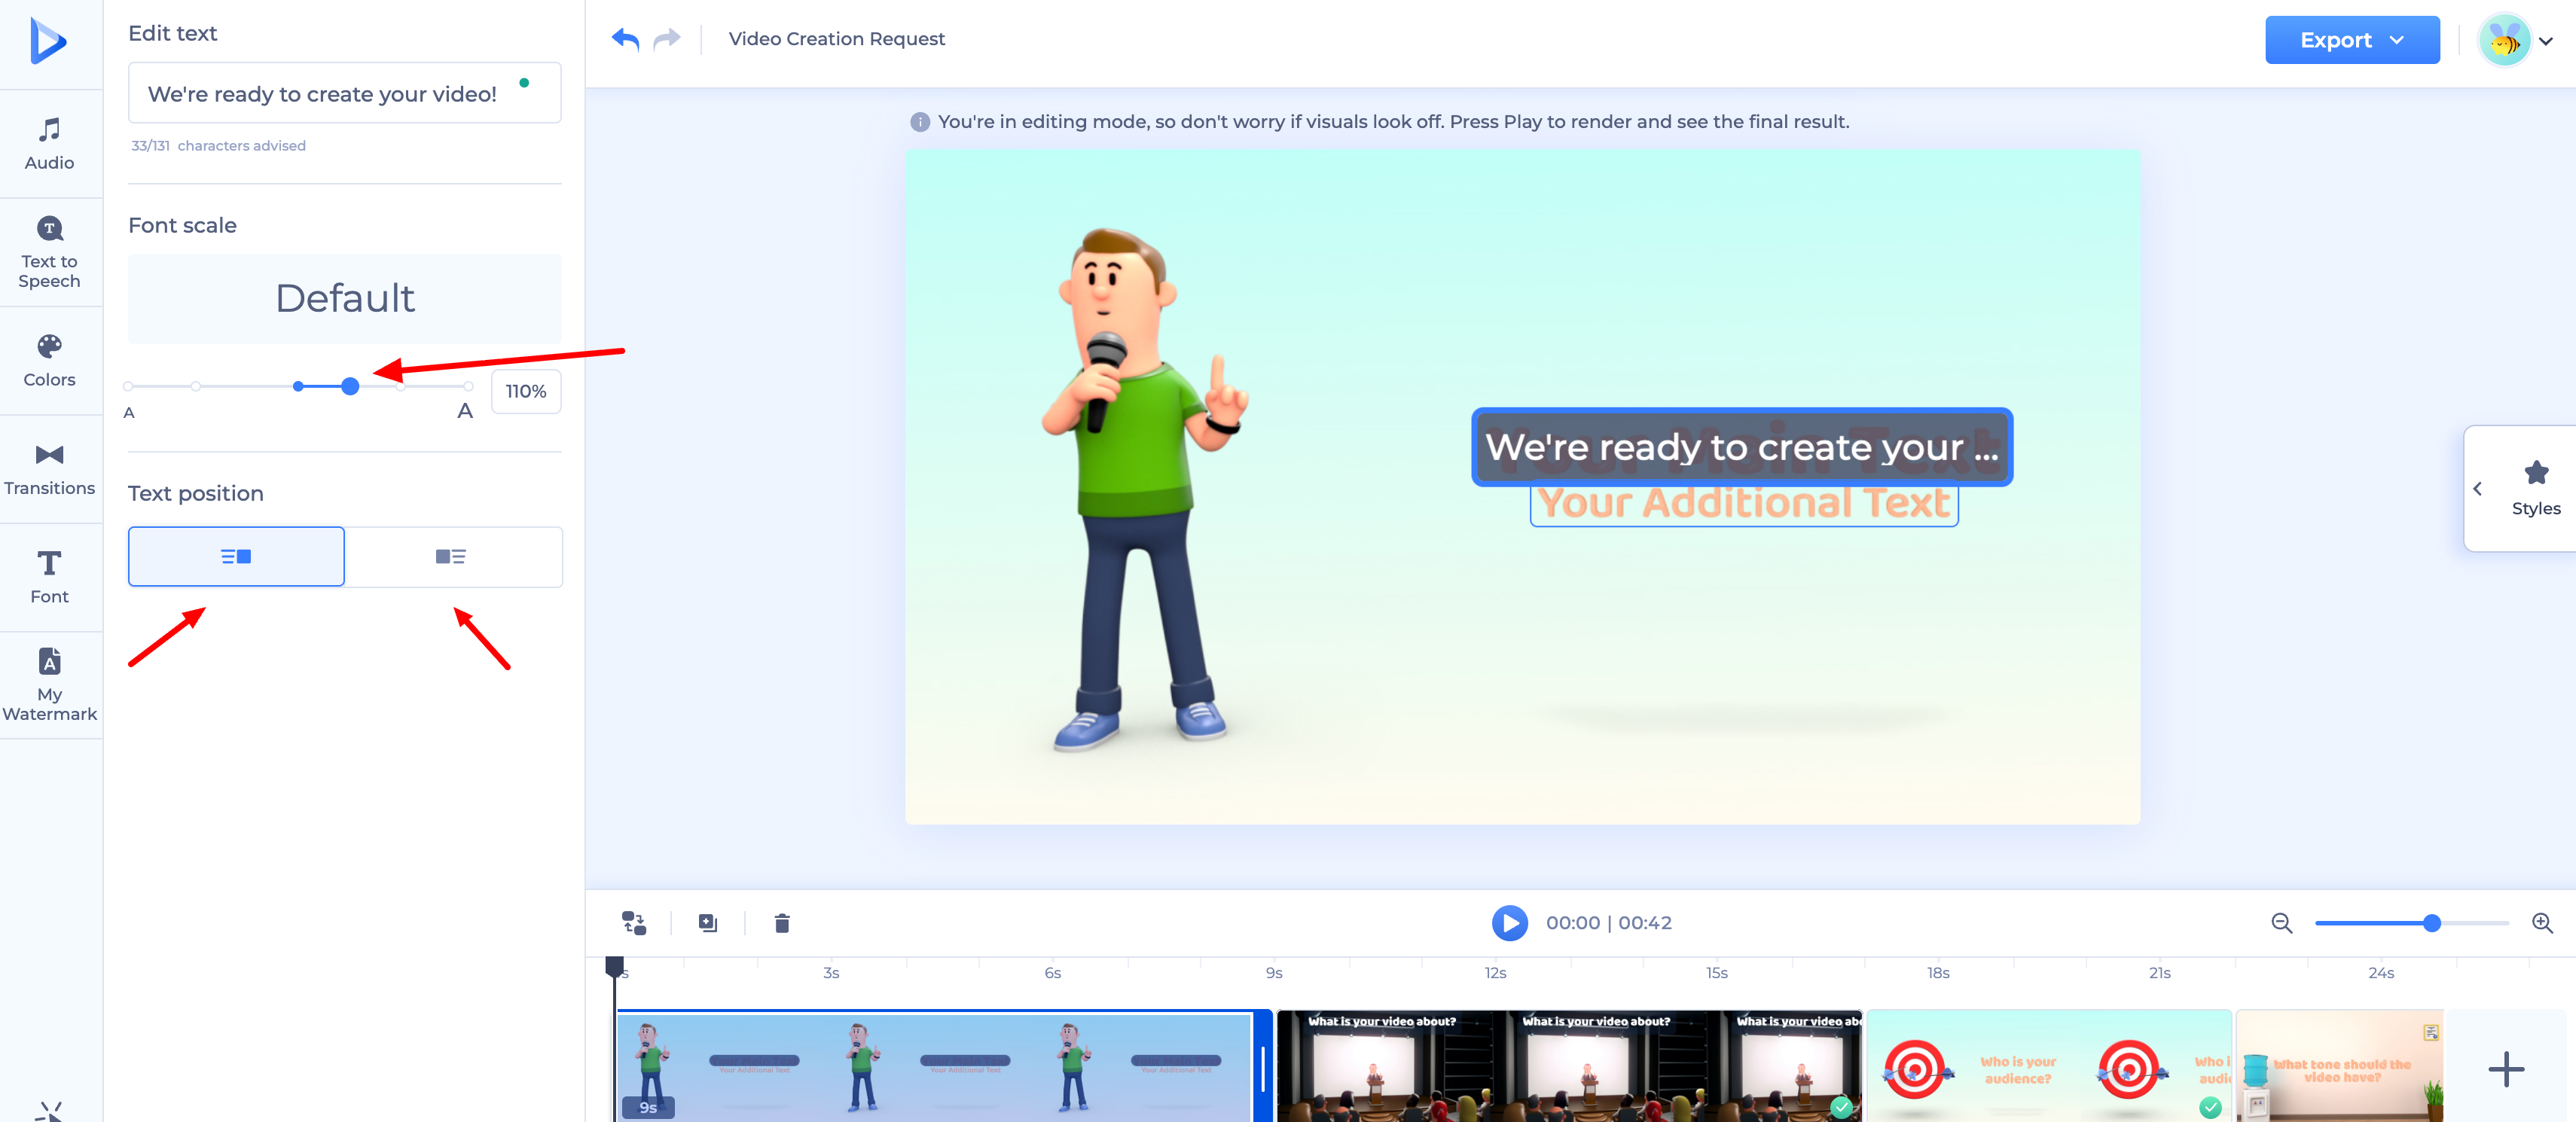
To add or edit text in your video project, click on the text holder and type in what you'd like it to say. Each text field shows a live character count with an advised limit, helping you keep your text a good fit for the scene.
From the panel on the left, you can also adjust:
- Font scale: use the slider (or type a percentage) to resize your text.
- Text position: choose how the text is aligned and laid out within the scene.
Navigating the Timeline
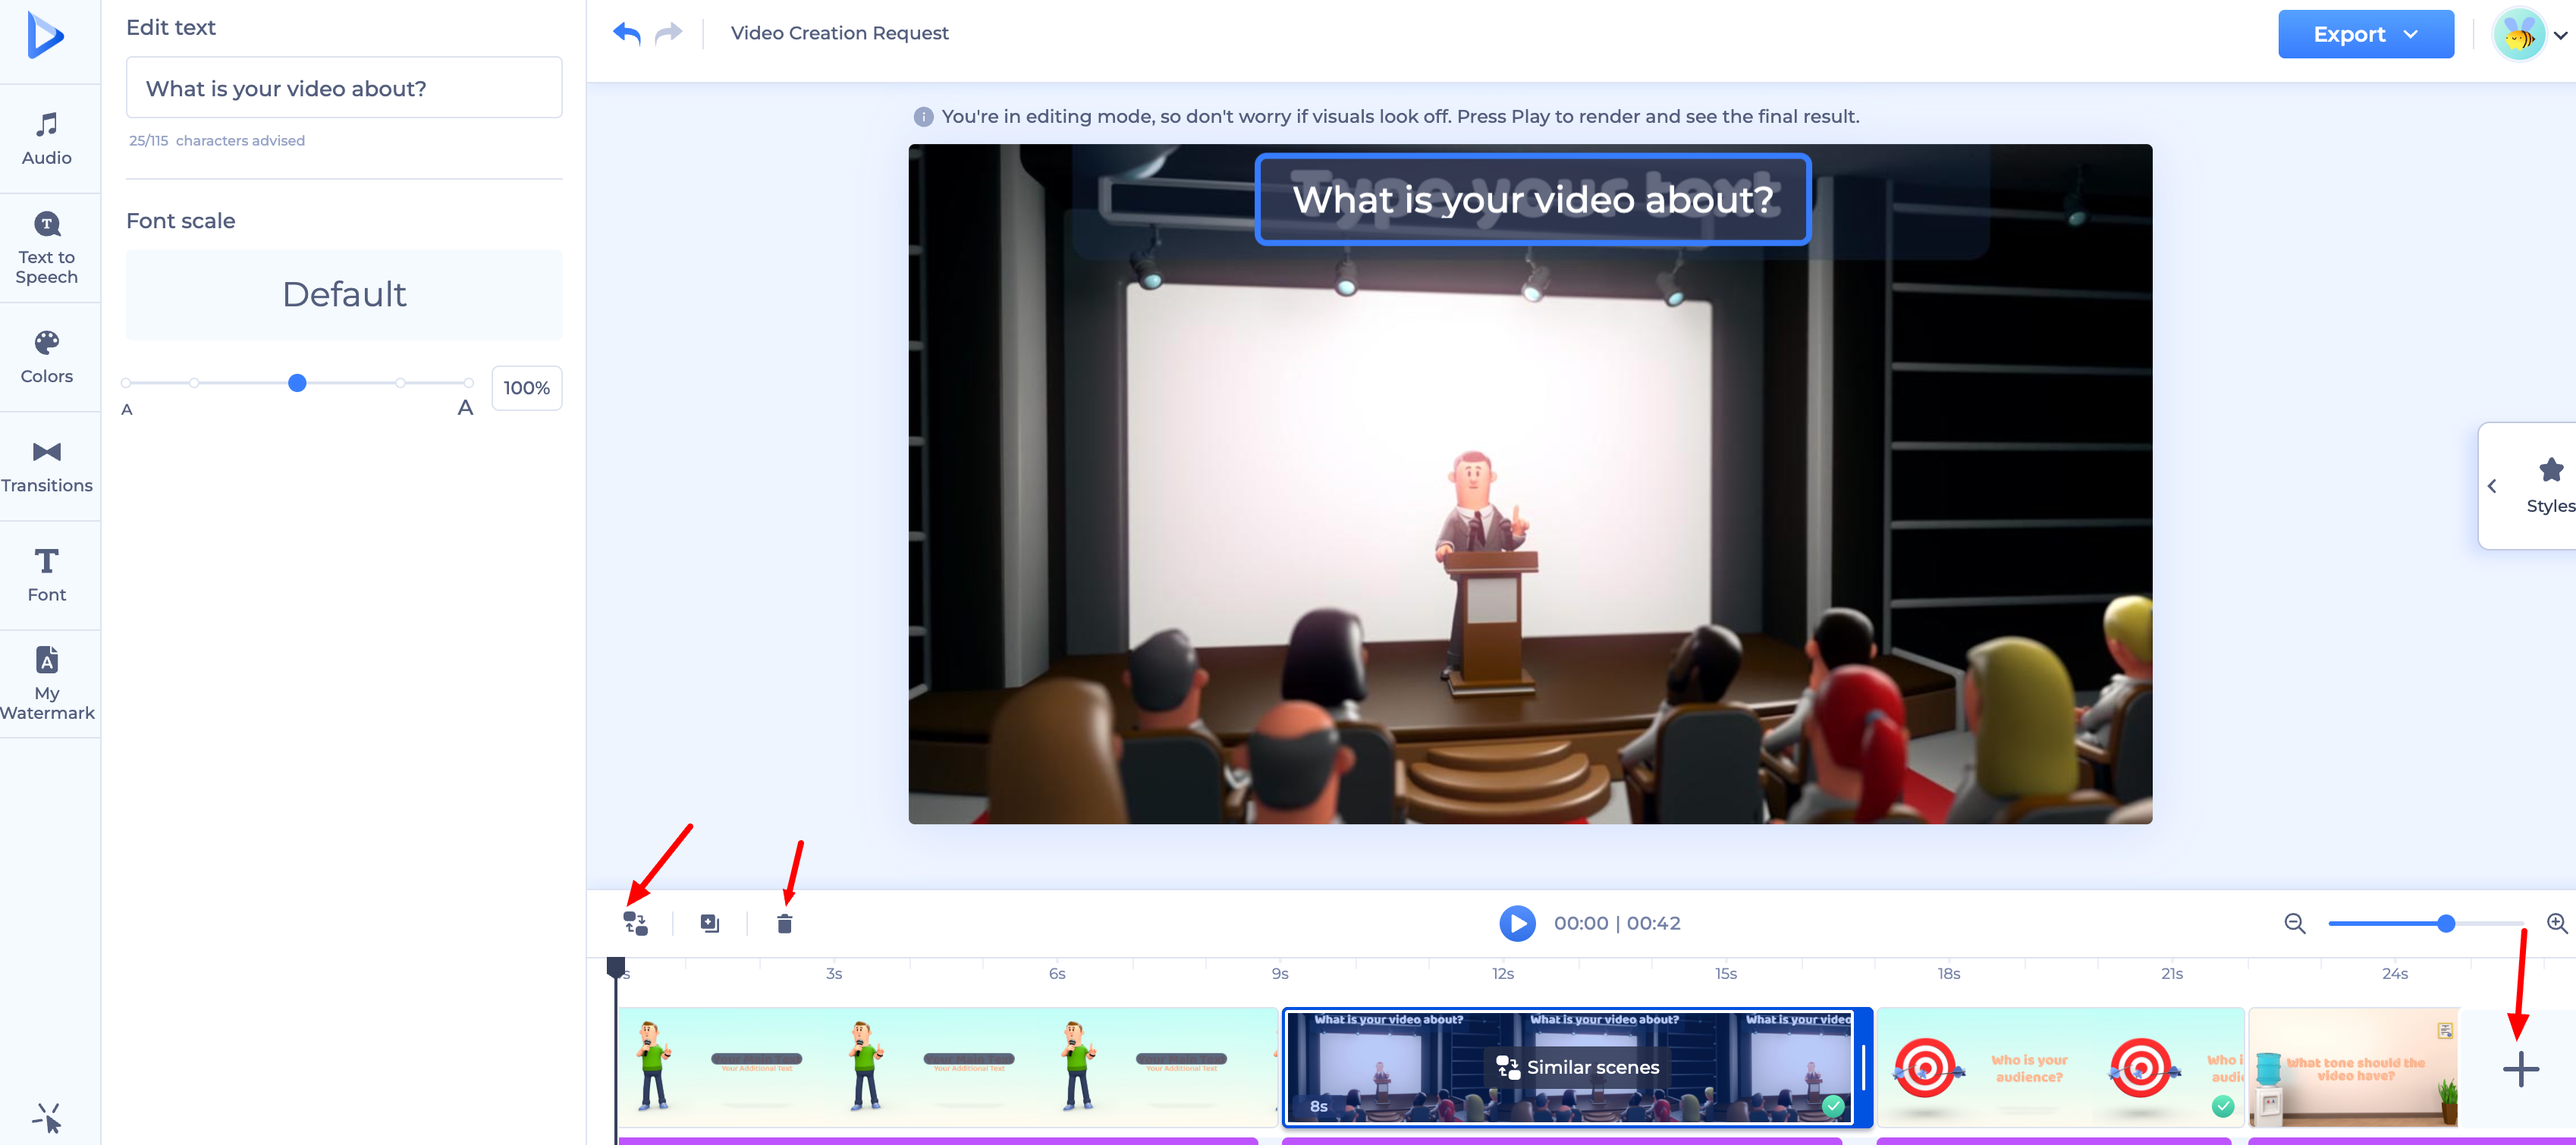
At the bottom of the Video Maker editor, you'll find the timeline — a key tool for shaping your video. Above it sits a small toolbar with three tools:
- Similar Scenes: swap the selected scene for a similar one without starting from scratch.
- Add Scene: insert a new scene into your project.
- Delete: remove the selected scene.
For flexible templates, you can control scene duration by dragging within the timeline, and rearrange scenes with a simple drag-and-drop. The timeline also shows both your overall project duration and each scene's individual length, giving you a clear picture of your video's structure at a glance.
Managing Audio Layers
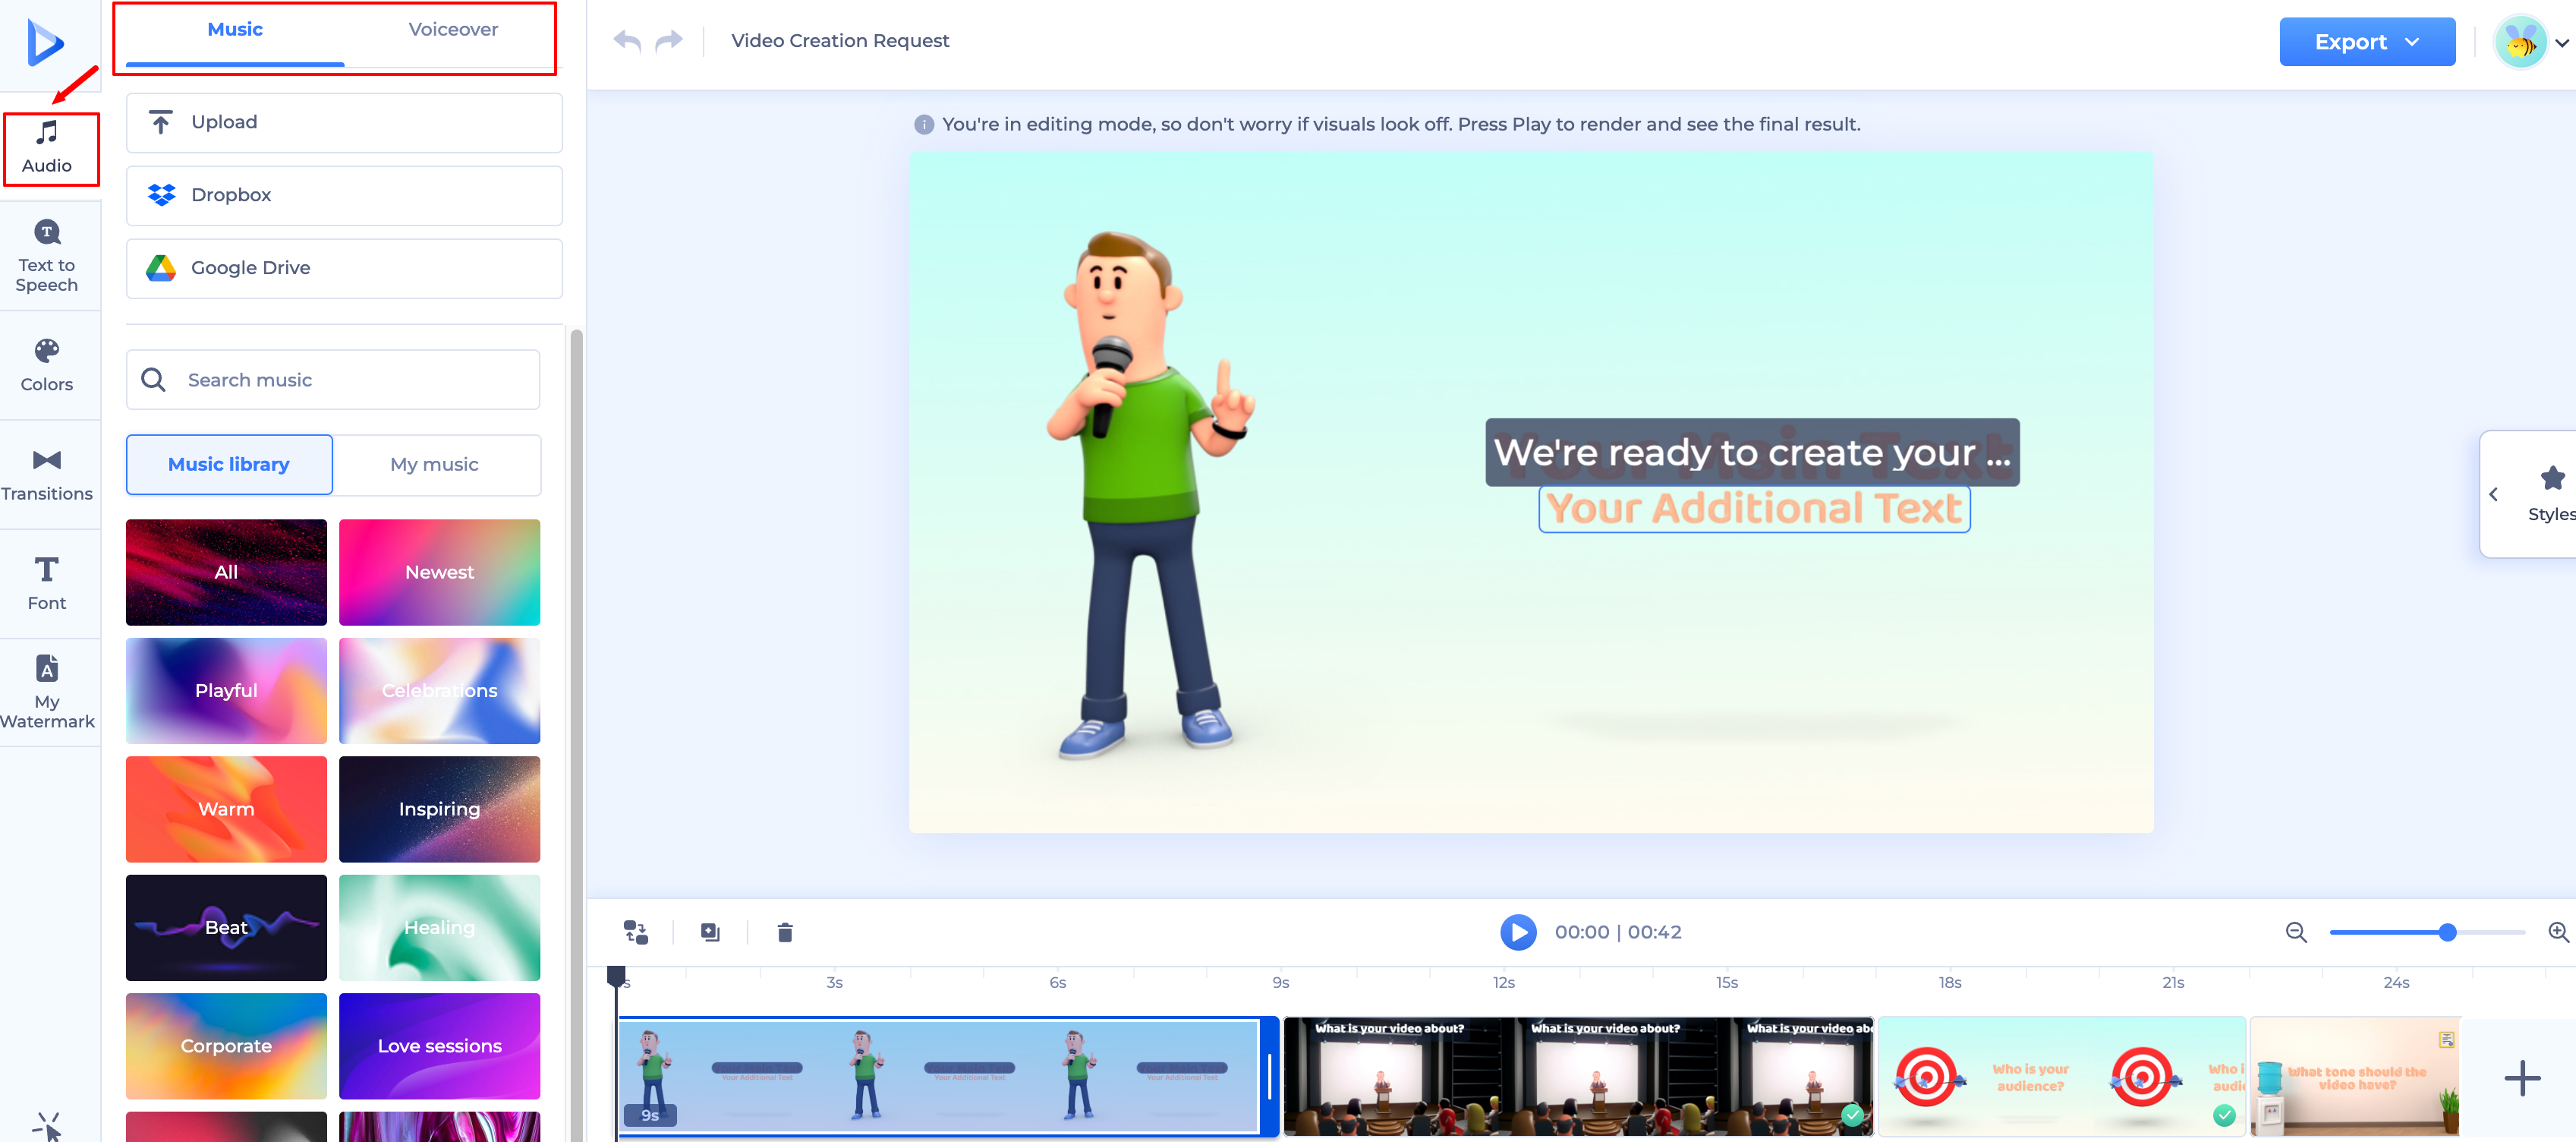
Click "Audio" in the left-hand toolbar to open the audio panel, split into Music and Voiceover tabs.
Music tab
- Upload your own track, or connect via Dropbox or Google Drive.
- Search the music library directly, or browse by mood — categories include Newest, Playful, Celebrations, Warm, Inspiring, Beat, Healing, Corporate, and more.
- Switch between "Music library" (Renderforest's collection) and "My music" (tracks you've uploaded).
Voiceover tab
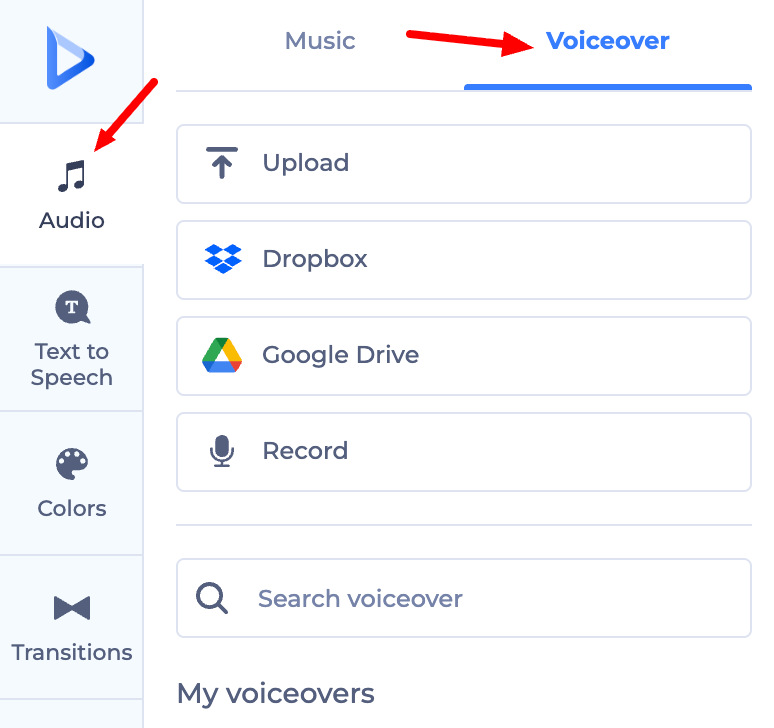
- Upload a file, connect via Dropbox or Google Drive, or record your voiceover directly within the tool.
- Search for a voiceover, or pick from "My voiceovers," where your previously uploaded or recorded clips are saved.
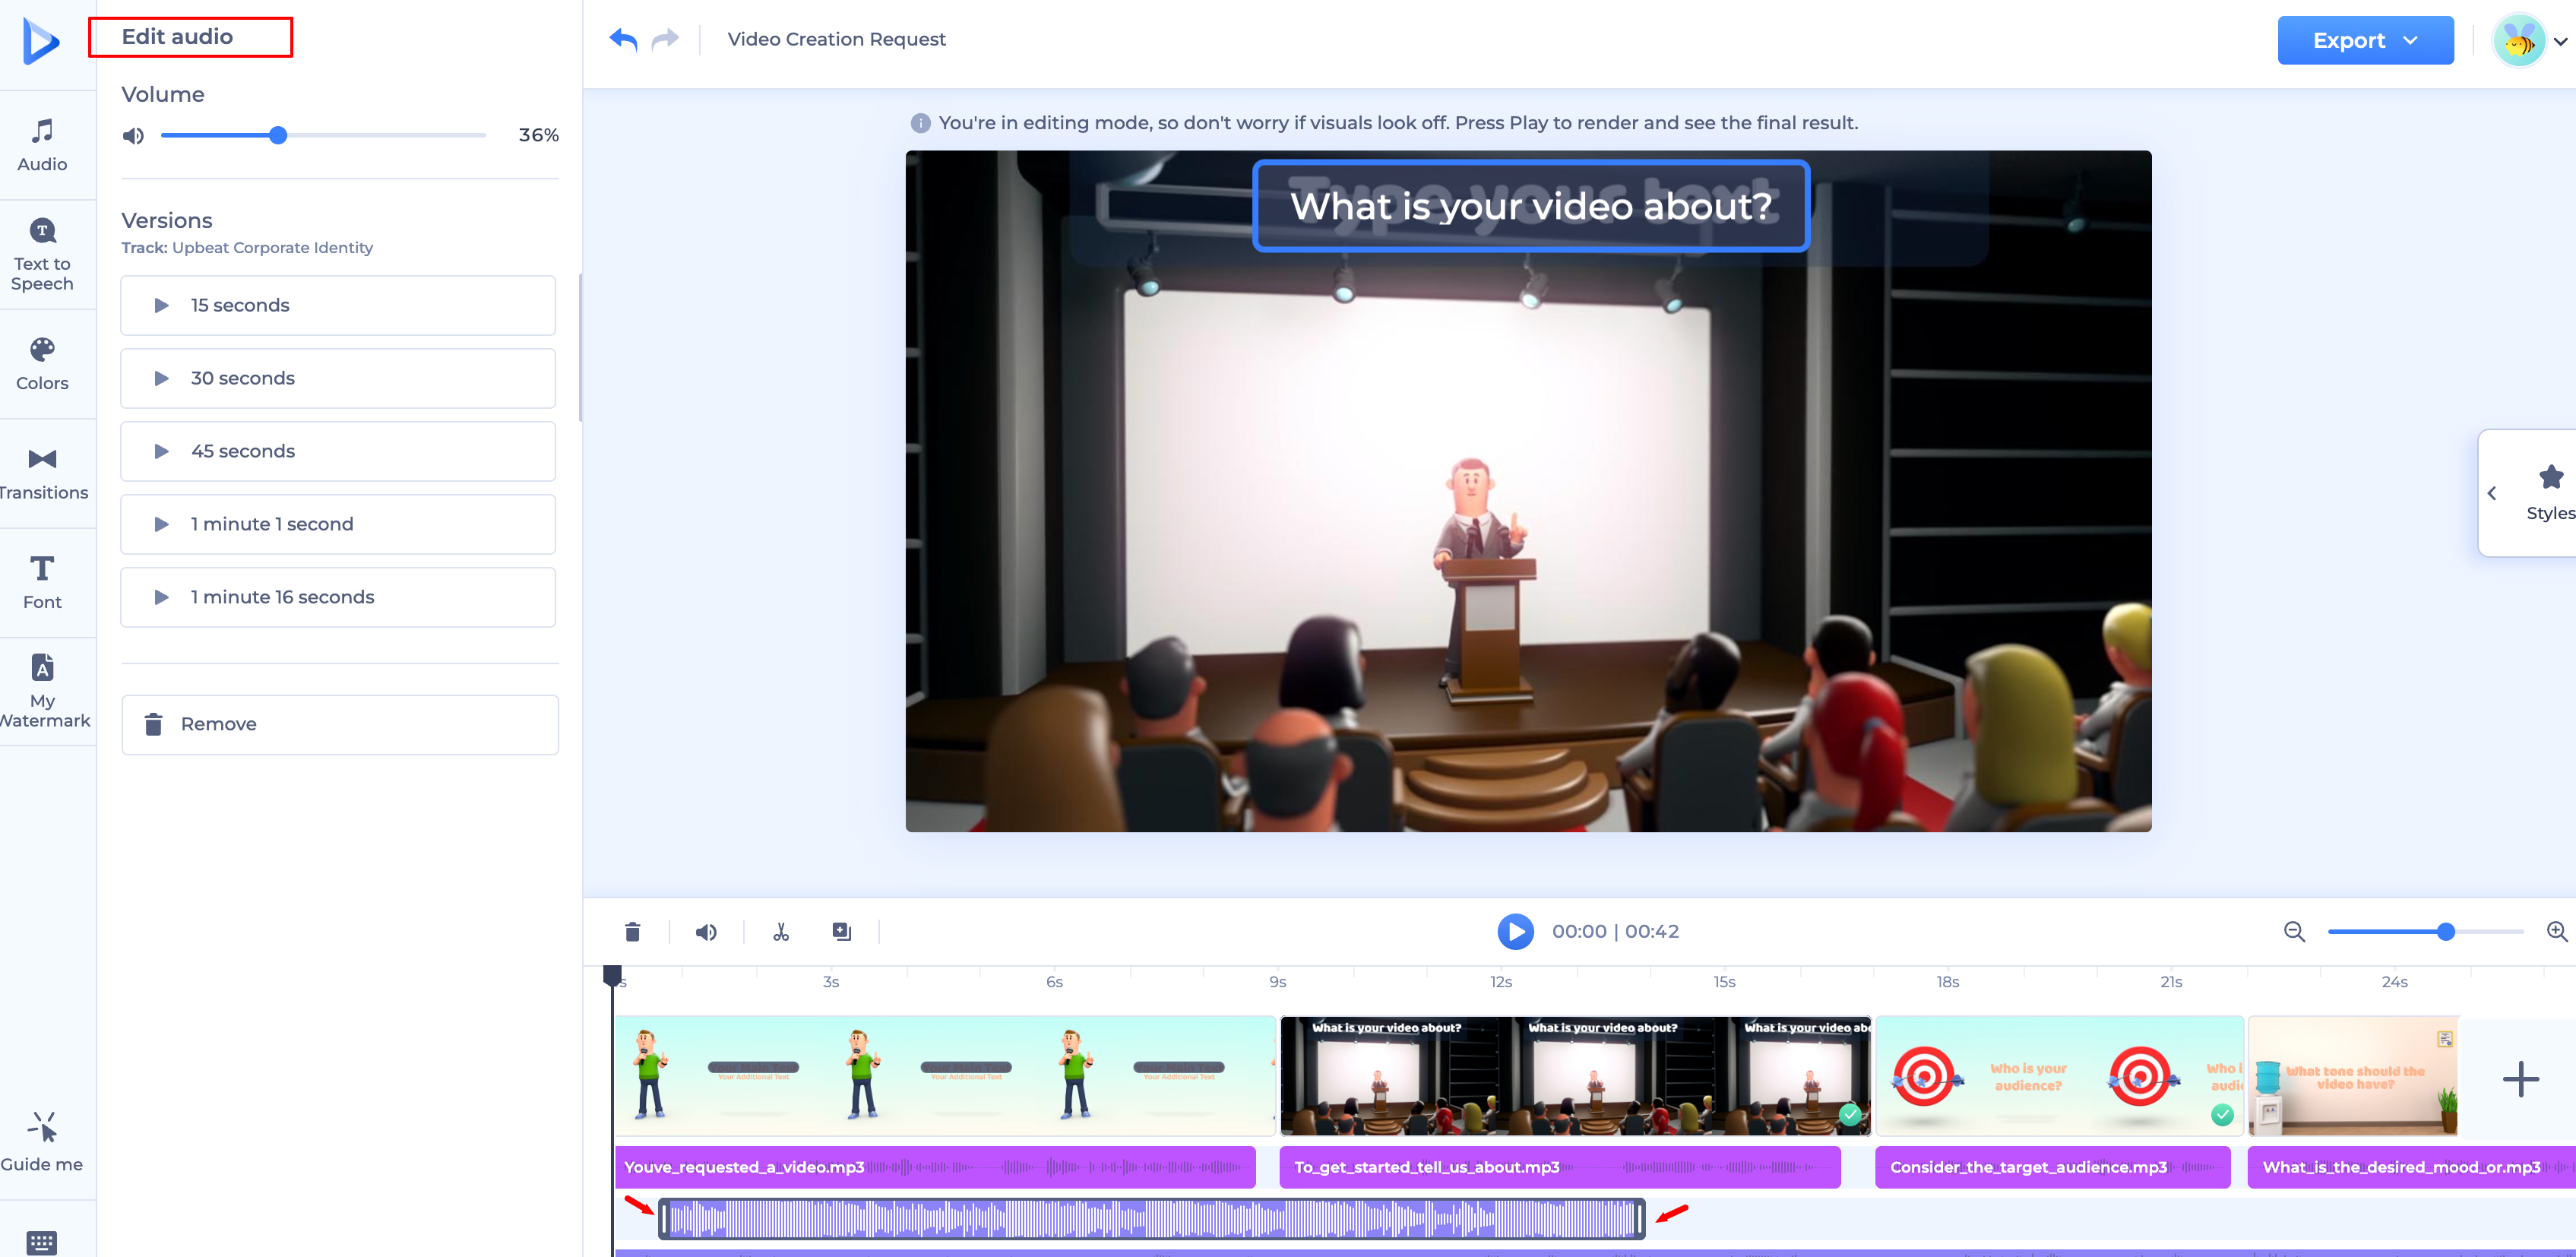
Once your music or voiceover is added, it appears as its own layer on the timeline. Click a layer to activate it, then:
- Remove: click the bin icon to delete the layer.
- Adjust volume: raise or lower it to fit your project.
- Trim (music only): use the trim button to shorten the track to the length you need.
Was this article helpful?
That’s Great!
Thank you for your feedback
Sorry! We couldn't be helpful
Thank you for your feedback
Feedback sent
We appreciate your effort and will try to fix the article