- Text
- Colors
- Style
- Sharing your website editor with a collaborator
- Widgets: Messengers and Live Chats
- Settings
- Domain and Subdomain
- Marketing Integration
- Making the website multilingual
The left sidebar on the editor functions as the admin panel, enabling you to personalize various elements of your website. This includes text, colors, style, widgets, and settings. Now, let's explore each section and uncover the variety of tools and options available to you.

The Text section enables you to select a font from the provided library and adjust the text size for various types of text, including headings and body texts. This ensures that your text remains consistent and visually appealing throughout the website.

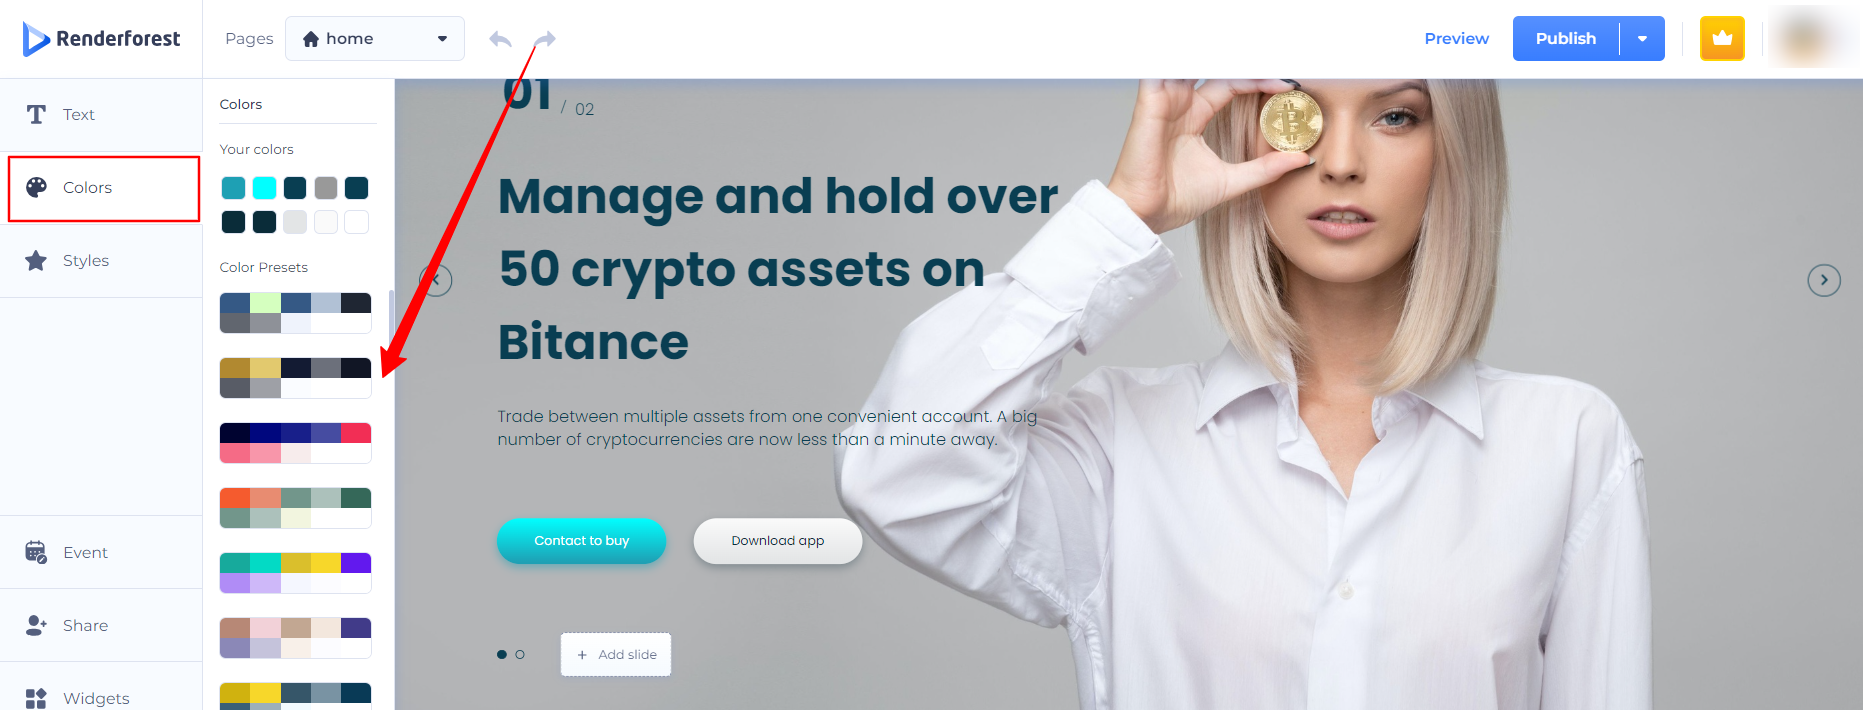
The Colors section is where you can set the colors for your website. You can choose from a color preset or set the colors for each element according to your branding:
There is also a built-in color picker where you can paste the exact color code or add a palette from the "My Colors" section:

The Style tab allows you to set the radius for button elements on the website. This can give your buttons a unique look and feel that aligns with your overall design:

The Share function is a useful tool for sharing your project editor with a contributor. You can set an expiry date and time, and get a link to share with the contributor. This allows them to make further edits and collaborate with you on the website.

The Widget section is where you can organize communication between your website visitors through messengers or live chats:

You can set the position of the widget on the overall site, connect messengers with a link, phone number, or username, or integrate one of the live chats with a simple chat ID or token:

Once you connect a messenger, you can customize the widget window, such as adding an image, name, message, and button text:

Finally, the Website Settings window is where you can make important changes to your website.

The General section allows you to add the website name, get the sitemap of the website, and upload a favicon.

Add a social image, and attach an email to receive form submission emails:

The Domain section allows you to give your project an actual address by attaching a custom domain name or hosting it on a free Renderforest subdomain:


To add a domain purchased from a third-party provider:
Enter the domain name
Click Connect
Make sure your DNS settings are adjusted

To add a domain purchased from Renderforest:
Click My domains
Select the domain
Click Connect
Make sure the DNS settings are adjusted

For a more professional look and trust, it's recommended to attach your company domain name to make your site secure. By adding a free SSL certificate toggle, you can set up the domain DNS setting by redirecting the domain to our specified records.
In the "Marketing Integrations" section, you can set up various necessary integrations to collect and analyze data for your website:

One of the most useful integrations is Google Analytics, which allows you to track and analyze data such as website traffic, user behavior, and conversion rates.
To get started, all you need is your Google Analytics ID. This unique identifier is like a key that unlocks a world of data. To find your ID, simply head over to your Google Analytics account.
Once you have your ID in hand, it's time to connect it to your website. It's a breeze! Just enter your property ID, which typically starts with either UA or G, and click connect. Voila! You're now ready to dive into the world of analytics:

To connect your Yandex Metrica account, simply enter your unique tag number and click on the connect button. This tag number can be found within your Yandex Metrica account. By following this straightforward process, you will be able to seamlessly integrate your Yandex Metrica account and access its powerful analytics tools. Connecting your tag number is essential for tracking and analyzing website traffic, user behavior, and other valuable insights that can help optimize your online presence:

Another functional integration is Google Tag Manager, which allows you to manage and deploy marketing tags to collect and track marketing data. To connect your Google Tag Manager, simply enter your GTM container ID that starts with GTM and click connect! You can easily find this ID in your Google Tag Manager account:

You can also set up Google AdSense and ads.txt to match ads on your site and protect your advertisement inventory.
To establish a connection between your Google Adsense account and your website, it is again essential to enter the property ID that begins with "pub" and click on the connect option. You can locate this unique ID within the "Account Information" section of your Google Adsense account. By following this simple process, you will be able to seamlessly integrate your property with Google Adsense, maximizing its potential for monetization and enhancing your overall advertising experience.

If your website does not have an ads.txt file, it is important to create one in order to ensure proper verification. To do so, you can create a text file (.txt) using a plain text editor such as Notepad for Windows or TextEdit for Mac.
After creating the file, sign in to your AdSense account. If there is an alert on your homepage, click on "Fix now". If not, navigate to the "Sites" section and select the site with the "Not found" ads.txt status.
Next, click on "Copy" and paste the line into each of your ads.txt files. Make sure to replace "pub-0000000000000000" with your own publisher ID. Once completed, your ads.txt file should resemble the provided example: "google.com, pub-0000000000000000, DIRECT, f08c47fec0942fa0".
Paste this text into the ads.txt section and click save.

Additionally, you can attach the Facebook Pixel ID to track and collect data from Facebook ads. To seamlessly integrate your Facebook Pixel into your website, it is essential to enter your unique pixel ID and click on the connect button. This pixel ID can be found within your Facebook Business Manager account. By following these simple steps, you will establish a strong connection between your website and Facebook, allowing you to track and optimize your advertising campaigns effectively. The Facebook Pixel plays a crucial role in collecting valuable data and insights, enabling you to understand your audience better and make informed marketing decisions:

Another powerful tool you can use is the Semrush Keyword Magic Tool. It is a marketing SaaS platform that provides SEO-related data:

Semrush analyzes millions of keywords, ads, and URLs each day. With the help of this integration, you can instantly get recommendations on SEO, content marketing, and advertising that will help you improve your online visibility in a short period. The tool allows you to get real-time SERP analysis for your website without leaving the Renderforest editor. This is a great way to optimize your website and improve your online visibility:

The ability to create a multi-language website can help you expand your reach and make contact with a wider audience.
On the website builder tool, you have the option to select a primary language for your website, as well as add multiple secondary languages:

Once you add the languages, you can change the primary language using the flag icon that says "SET PRIMARY":

You also have the option to toggle the visibility of each language and delete them if necessary:

To add a new language, click the "add language" button, select from the list, and adjust the settings. Be sure to click the "save" button to apply all changes:

The language list will appear on the top bar, and you can access the settings directly from the language drop-down:

It's important to keep in mind that translating the content of your website is not the only step, you also need to verify that all the parts of the website are working properly in different languages such as buttons, forms, and labels.
In conclusion, the left sidebar on the editor offers a range of tools and options to help you create a visually appealing and functional website. By exploring each section and understanding the options available, you can create a website that aligns with your brand and meets the needs of your users.
Was this article helpful?
That’s Great!
Thank you for your feedback
Sorry! We couldn't be helpful
Thank you for your feedback
Feedback sent
We appreciate your effort and will try to fix the article