TABLE OF CONTENTS
- Uploading Images to Your Mockup
- Fitting Your Image: Fill, Fit, and Rotate
- Customizing Colors
- Trying Other Mockups
- Downloading Your Mockup
Uploading Images to Your Mockup
On the mockup editor page, the Images section on the left lists each image slot in your mockup individually, by name (for example, "MacBook" or "First page" for a template with multiple elements). Click Upload next to a slot to add your image to it.
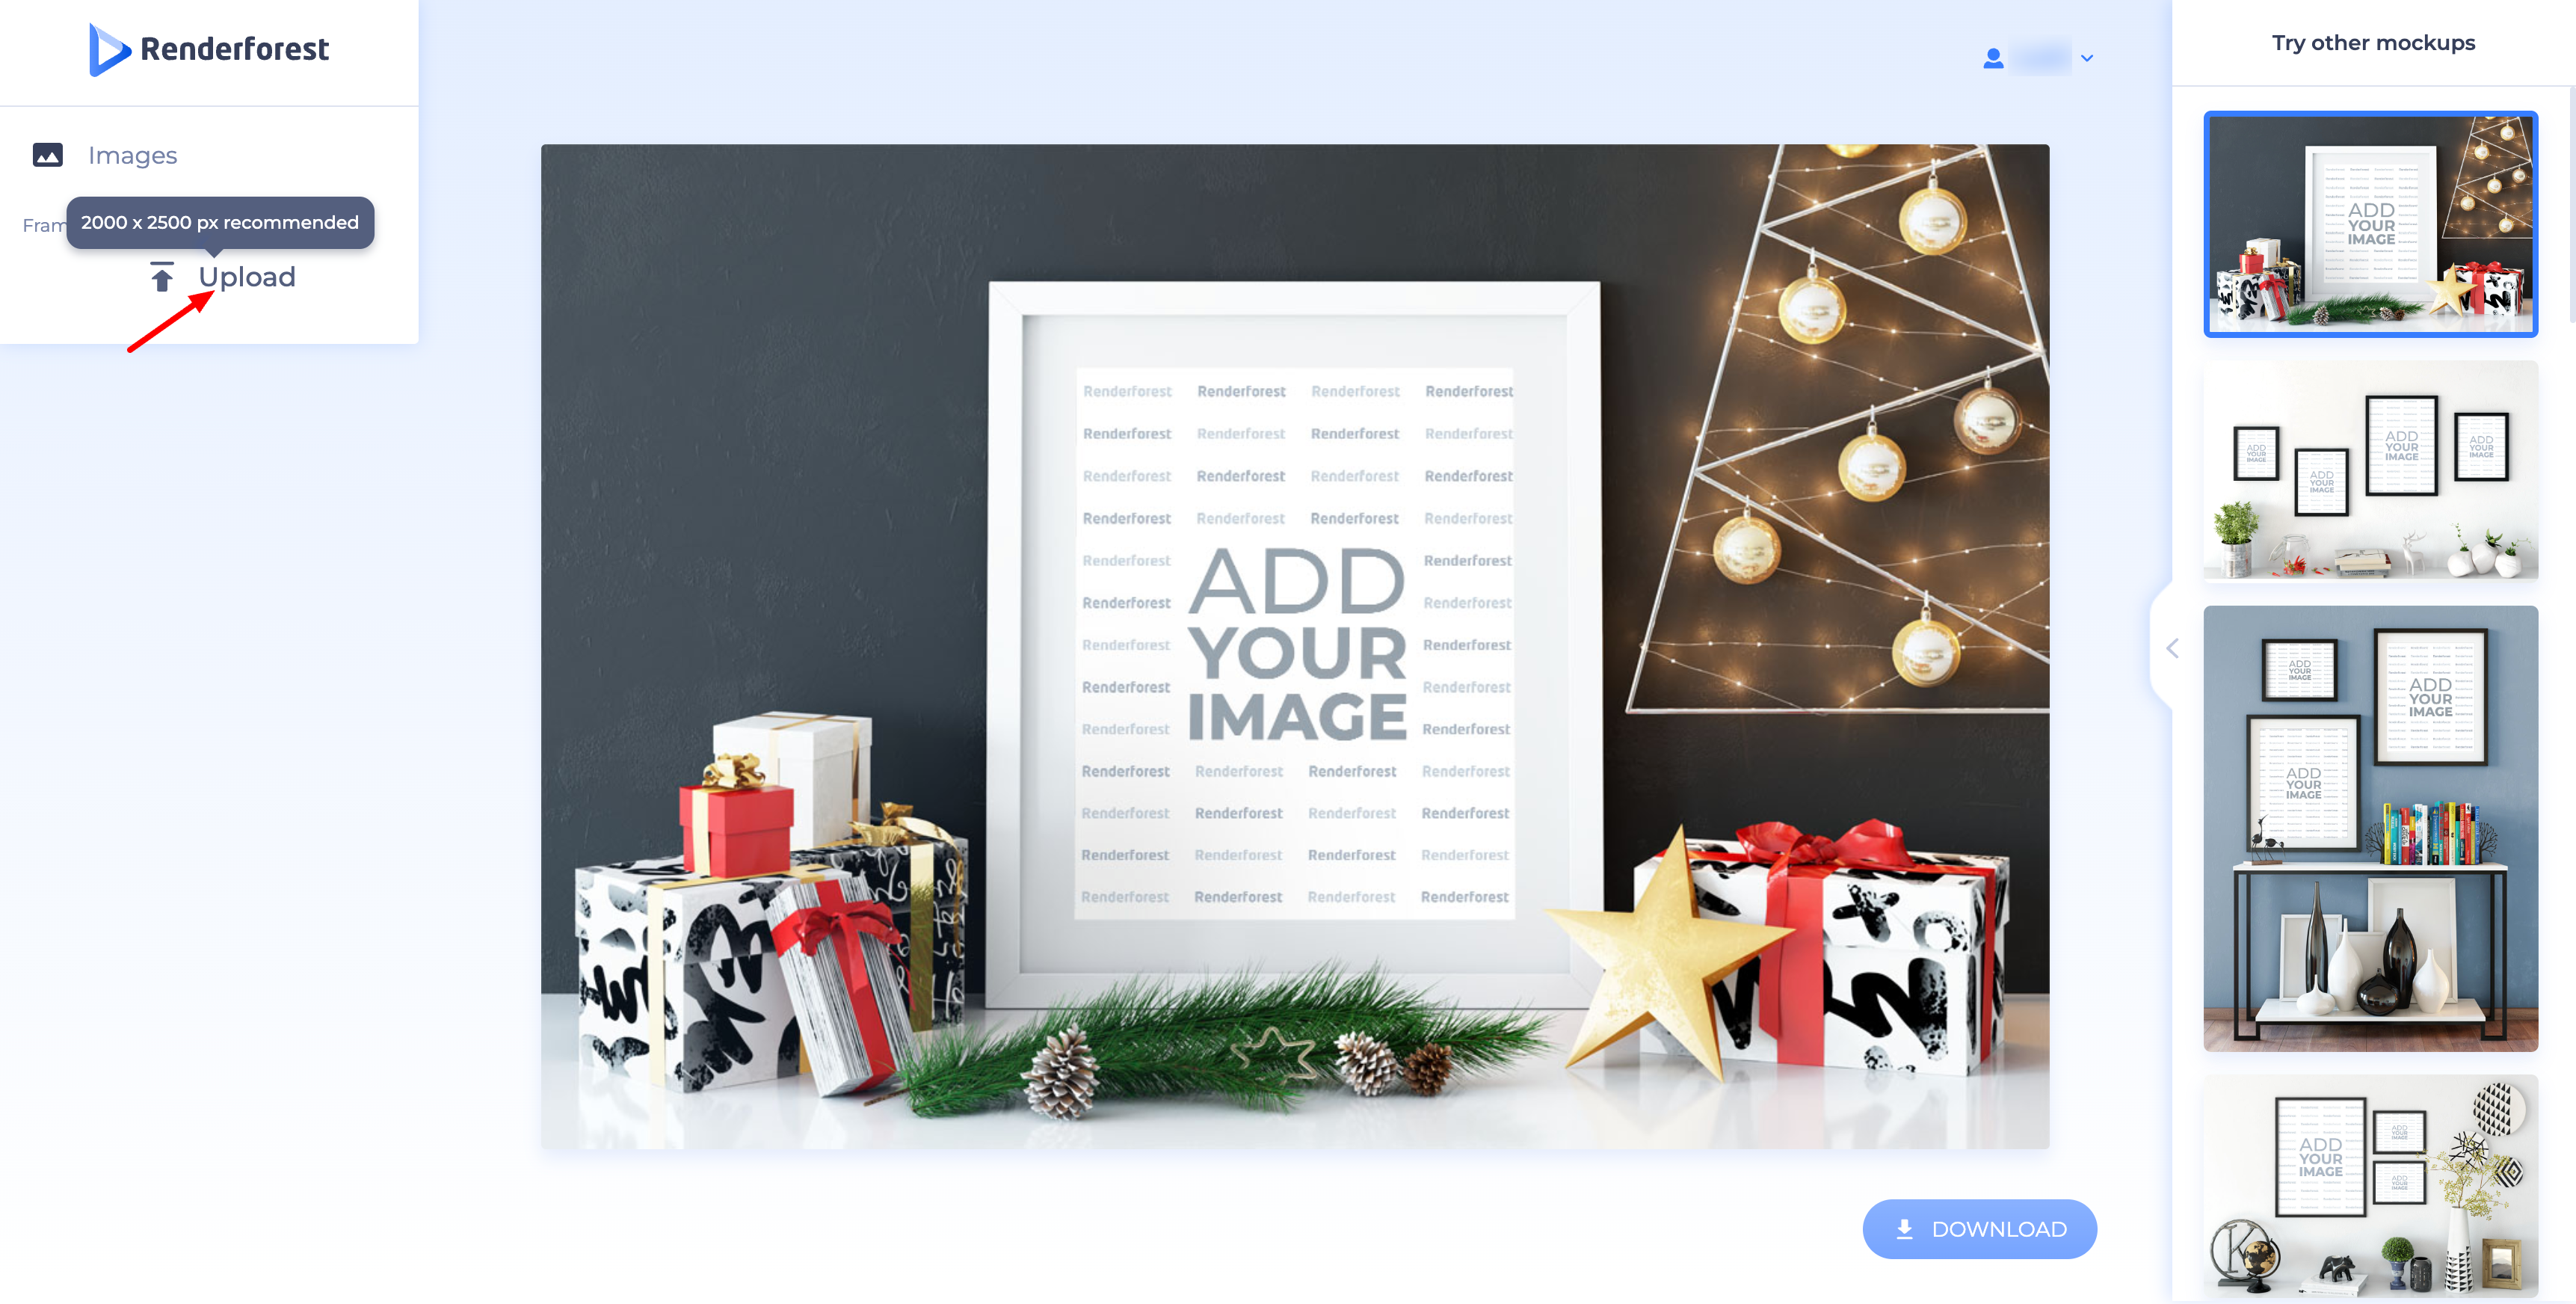
Each slot shows the recommended image size (for example, "2000 x 2500 px recommended") so you know what to aim for before uploading.
You can also upload a logo you created with the logo maker, or a graphic from the graphic maker, by browsing to My Files and selecting the relevant folder. This makes it easy to bring your own branding elements into the mockup for a cohesive, professional final product.
Fitting Your Image: Fill, Fit, and Rotate
After uploading an image, a positioning window opens with a grid overlay to help you line things up. At the bottom, you'll find: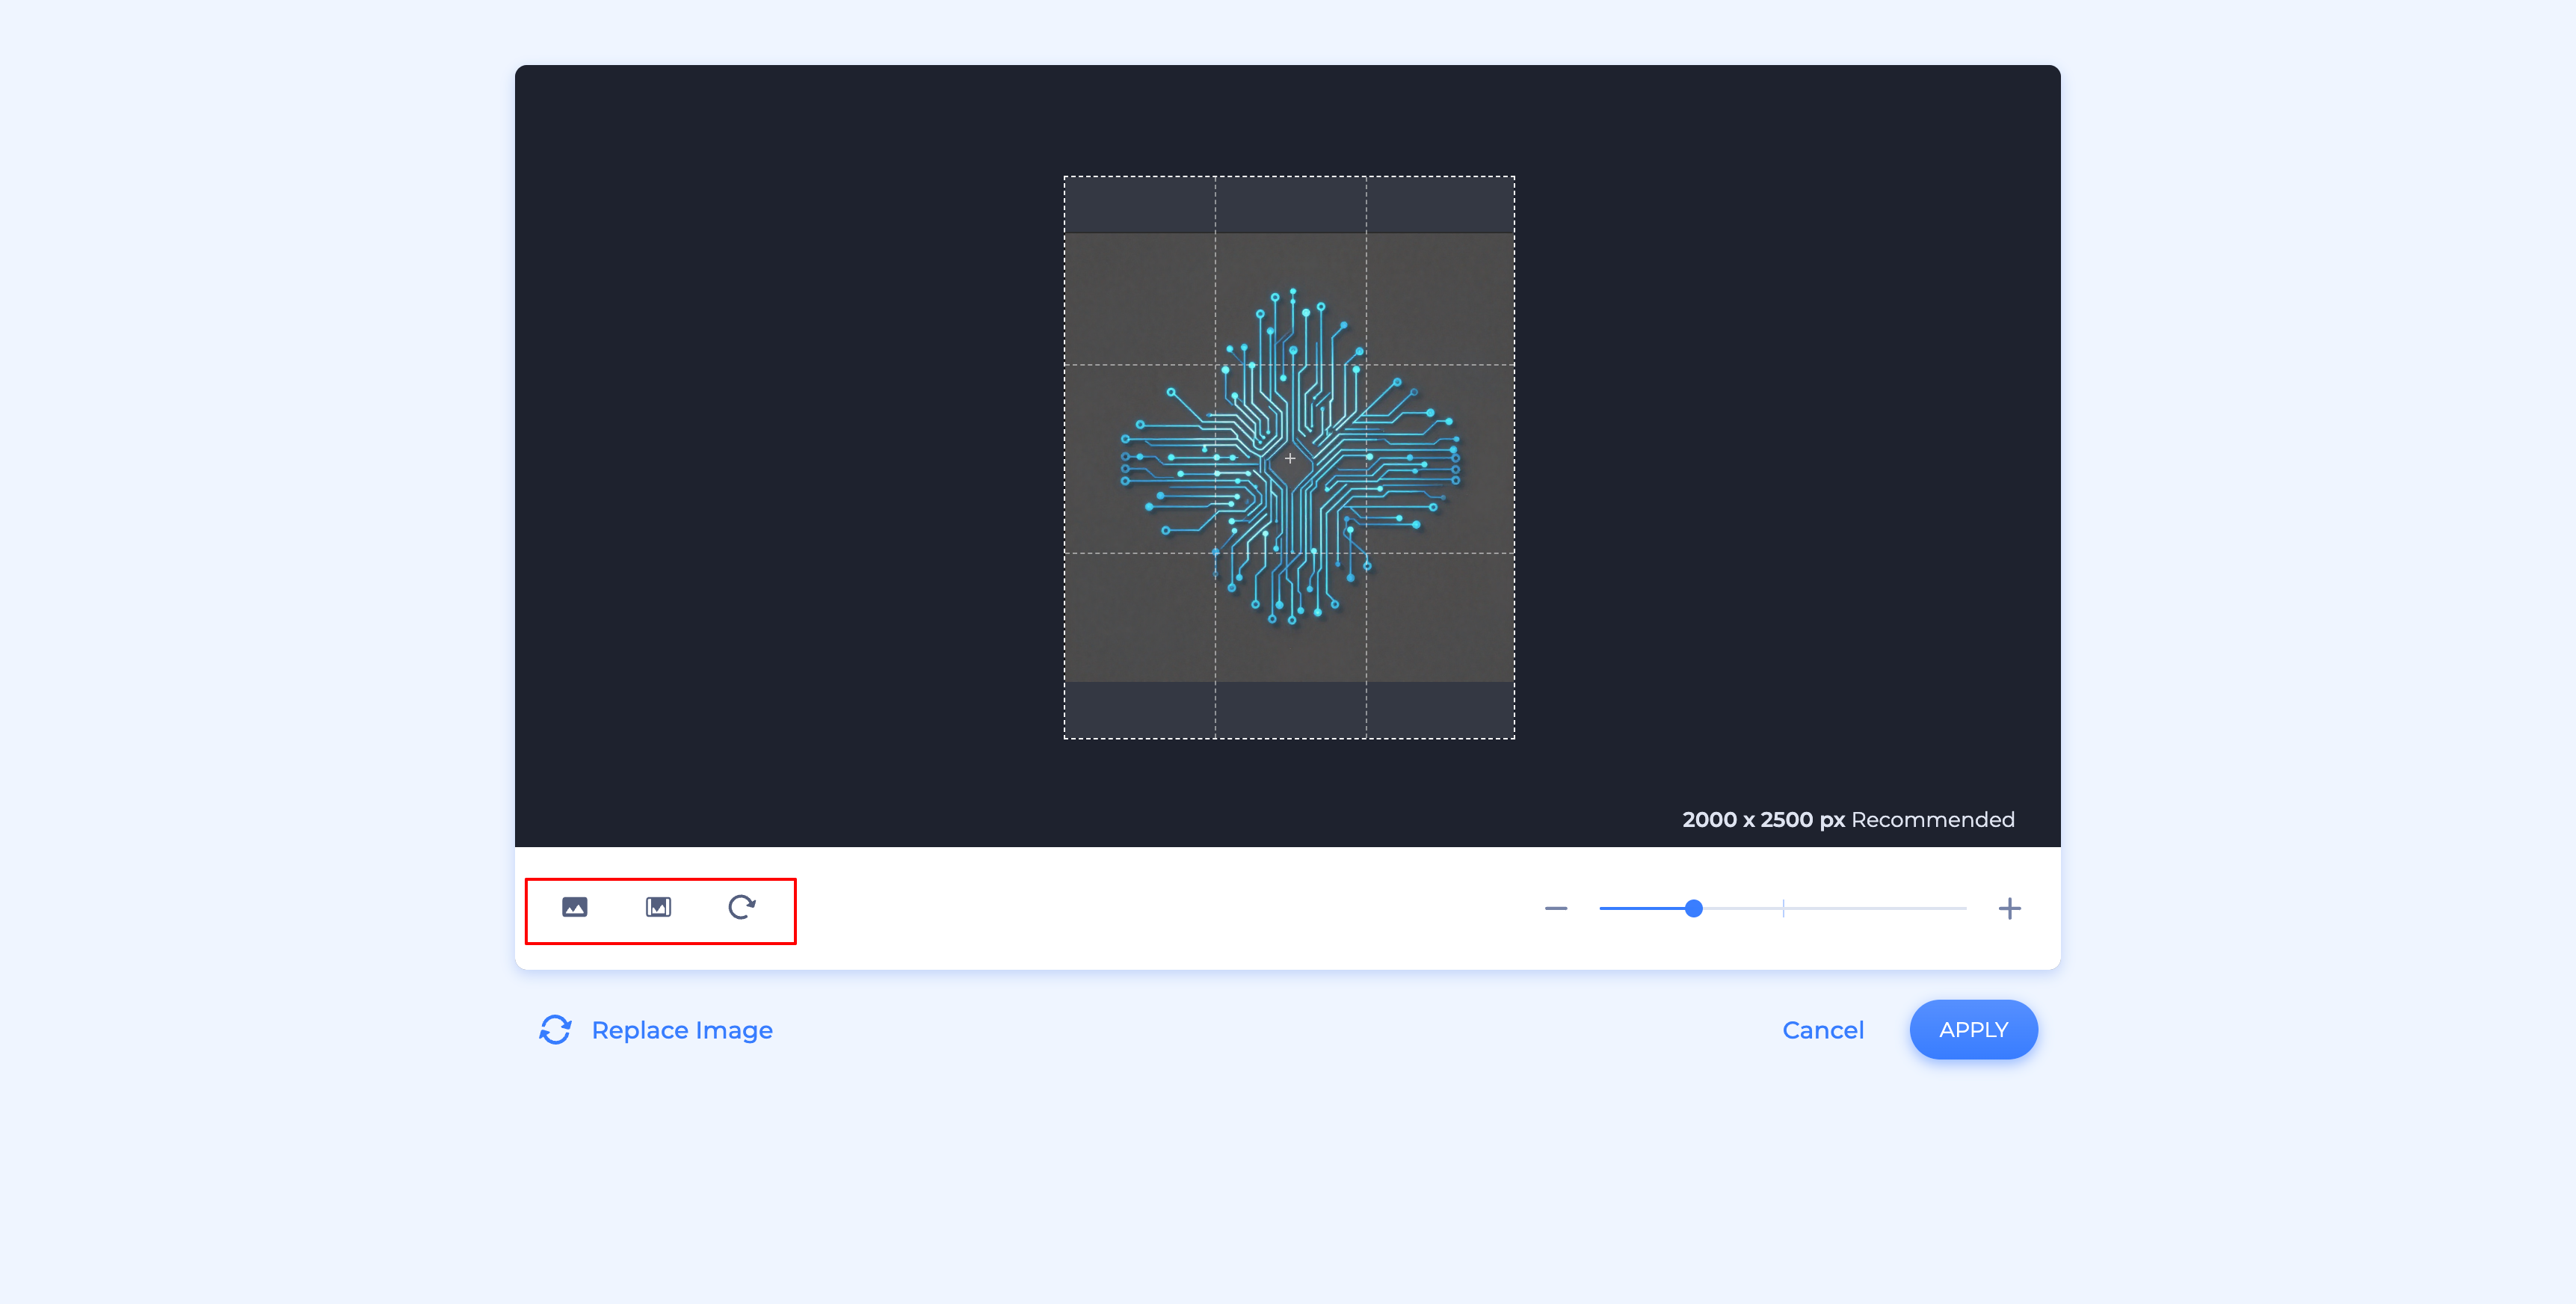
- Fill — expands your image so it covers the full frame with no empty space. Part of your image may be cropped to achieve this.
- Fit — ensures the whole image fits within the frame with nothing cropped out. Depending on the shapes of your image and the mockup frame, this may leave some blank space.
- Rotate — flips your image clockwise until it's in the correct position. Useful for mockups that aren't perfectly straight, especially ones with text.
A zoom slider is also available to fine-tune the size of your image within the frame. When you're happy with the result, click Apply — or Cancel to discard your changes, or Replace Image to start over with a different upload.
Customizing Colors
Click Colors in the sidebar to adjust your mockup's background color. Use the gradient and hue sliders to pick a shade, enter an exact color using its hex code, or choose from the row of default colors.
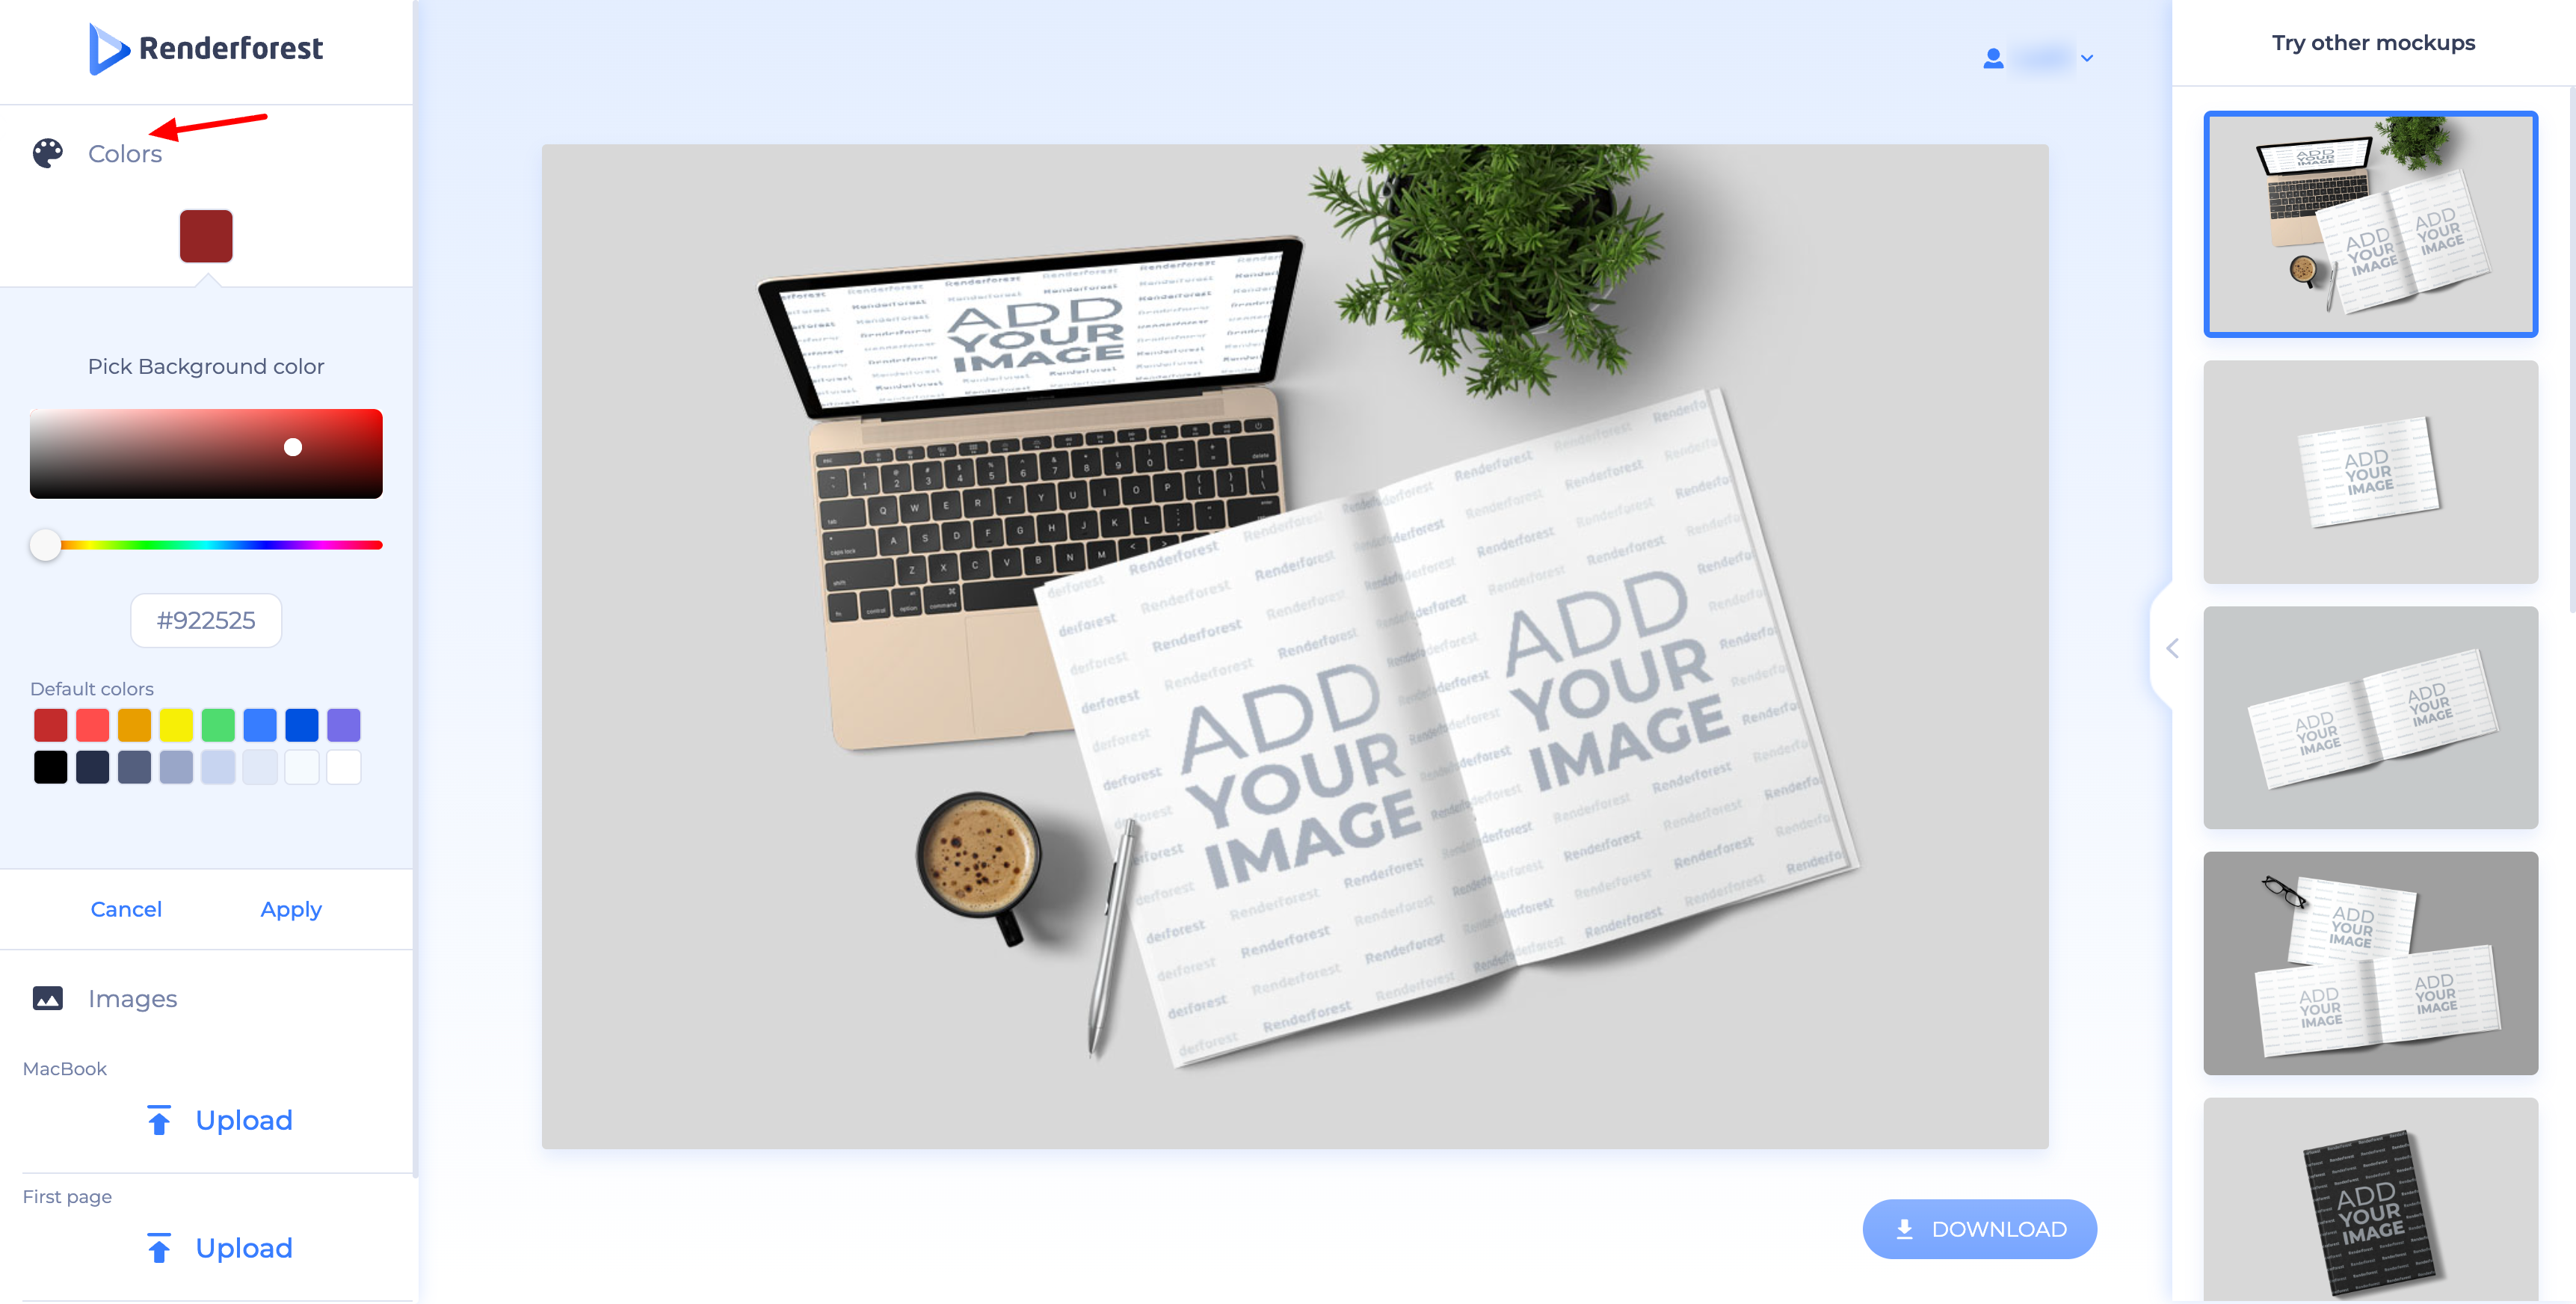
Some mockup templates offer only basic color options, like changing the background, while others allow more detailed customization — such as changing the color of individual elements like a phone, wall texture, or clothing.
Click Apply to confirm your color choice, or Cancel to discard it.
Trying Other Mockups
On the right side of the editor, the Try other mockups panel shows alternative scenes from the same template pack. Click any thumbnail to switch your project to that scene while keeping your uploaded images and settings.
Downloading Your Mockup
Once you're happy with your mockup, click Download to export it.
Was this article helpful?
That’s Great!
Thank you for your feedback
Sorry! We couldn't be helpful
Thank you for your feedback
Feedback sent
We appreciate your effort and will try to fix the article